DeepPavlov (Sentiment Analysis Per Message)
This article explains how to set up sentiment analysis using DeepPavlov and a pre-built Docker image.
Live Helper Chat version 4.48v or higher is required.
Installing DeepPavlov
```shell
git clone https://github.com/LiveHelperChat/sentiment-per-message
cd sentiment-per-message
docker-compose -f docker-compose.yml pull
wget https://livehelperchat.com/var/deep_sentence_v2.tgz
tar zxfv deep_sentence_v2.tgz
rm -f deep_sentence_v2.tgz
Run the following command once:
docker-compose -f docker-compose.yml up
To run DeepPavlov as a service, execute:
docker-compose -f docker-compose.yml up -d
Testing the Installation
Use the following curl command to test the DeepPavlov installation:
curl -X POST \
  'http://127.0.0.1:5058/model' \
  -H 'accept: application/json' \
  -H 'Content-Type: application/json' \
  -d '{
  "sentences": [
    "I\'m sad"
  ]
}'
If the installation was successful, you should see an output similar to this:
[
  [
    "negative"
  ],
  [
    [
      0.0346120223402977,
      0.8017117977142334,
      0.023267682641744614,
      0.14040860533714294
    ]
  ]
]
You can also access the documentation by opening the following URL in your browser:
Configuring Live Helper Chat
These steps outline the requirements for integrating sentiment analysis with Live Helper Chat:
- Set the sentiment on the chat close event.
- Display the visitor's sentiment during the chat.
- Support Elasticsearch for sentiment analysis.
We will use webhooks to achieve this.
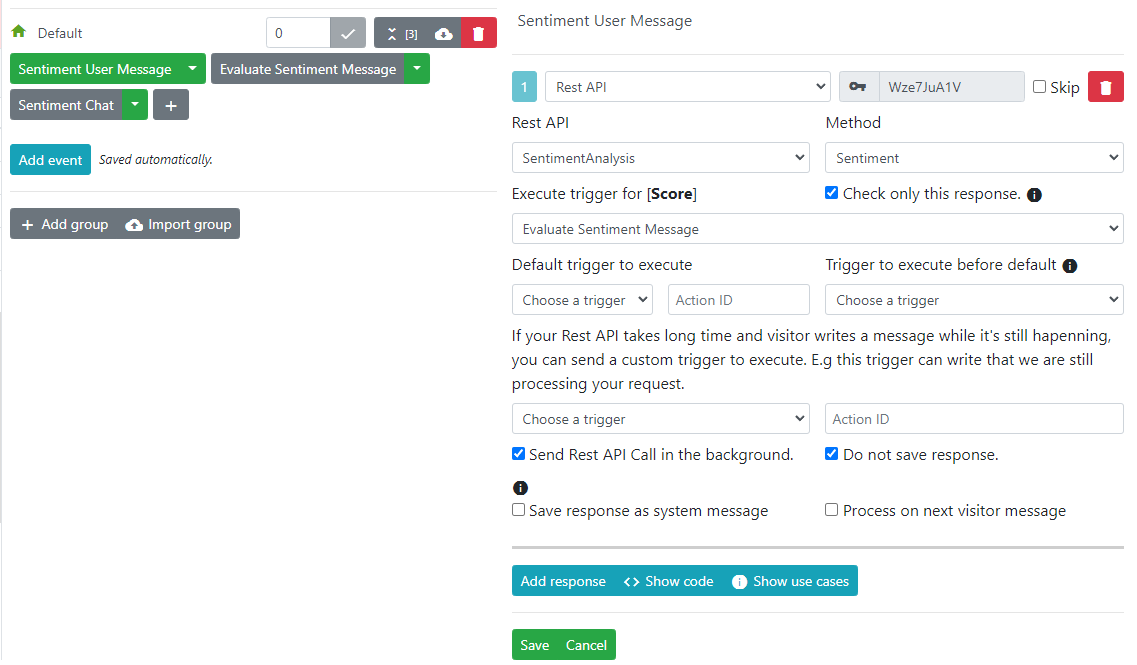
Configuring the REST API Call
In this setup, the REST API will send individual messages to determine their sentiment.
Download the configuration file.
After importing the configuration, ensure that you update the host if you are not running it on the local machine.
Configuring the Bot
Download the bot configuration file. You will need to configure the appropriate REST API calls.
For simplicity, the bot configuration includes the following triggers:
Sentiment User Message: This trigger is activated when a message is received from a visitor or operator. It listens to thechat.web_add_msg_admin,chat.chat_started, andchat.addmsguserevents.Evaluate Sentiment Message: This trigger processes the response from the REST API call.Sentiment Chat: This trigger performs all the aggregation and sets the main chat sentiment attributes. It is triggered by thechat.closeevent.
This configuration sets the following sentiment attributes:
- Sentiment for the operator and visitor.
- Visitor sentiment within each message.
- Visitor sentiment per chat.
Main Configuration for the REST API Call
It is strongly recommended to use the php-resque extension to offload all REST API calls.
If your webhook worker is already of the resque type, you can deselect the Send Rest API Call in the background option, as the process will already run in the background.
Evaluate Sentiment Message Trigger
This trigger stores the sentiment within the chat message and recalculates the sentiment for the entire chat.
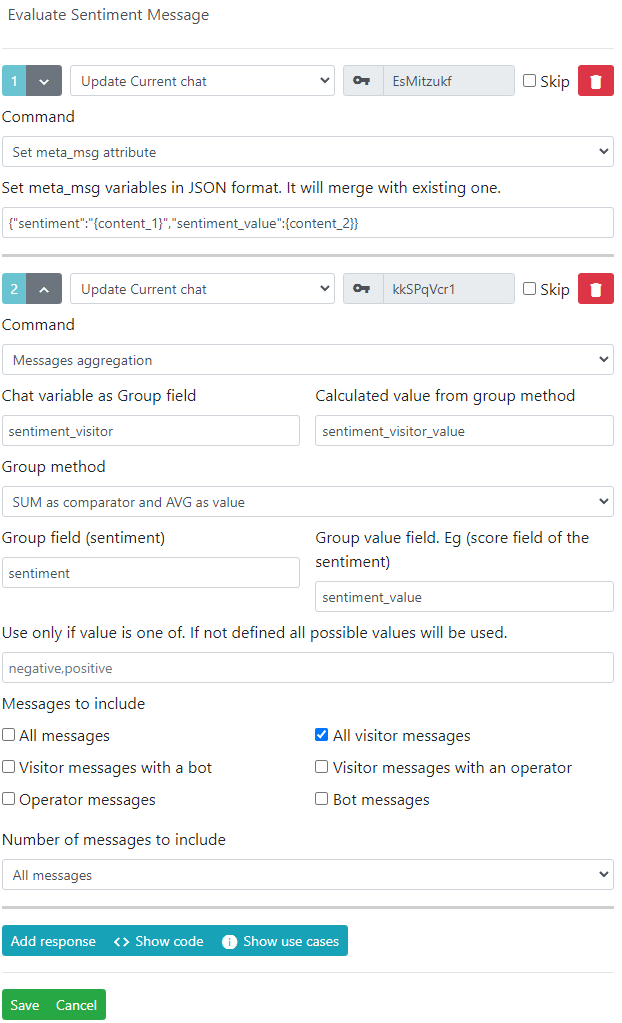
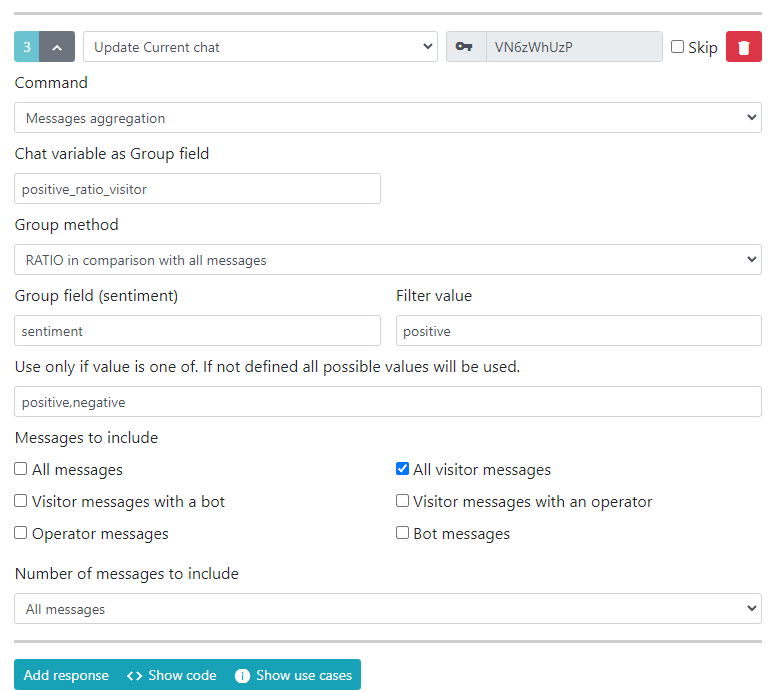
For more information about [Messages aggregation](bot/update-current-chat.md#Messages Aggregation), refer to the documentation.
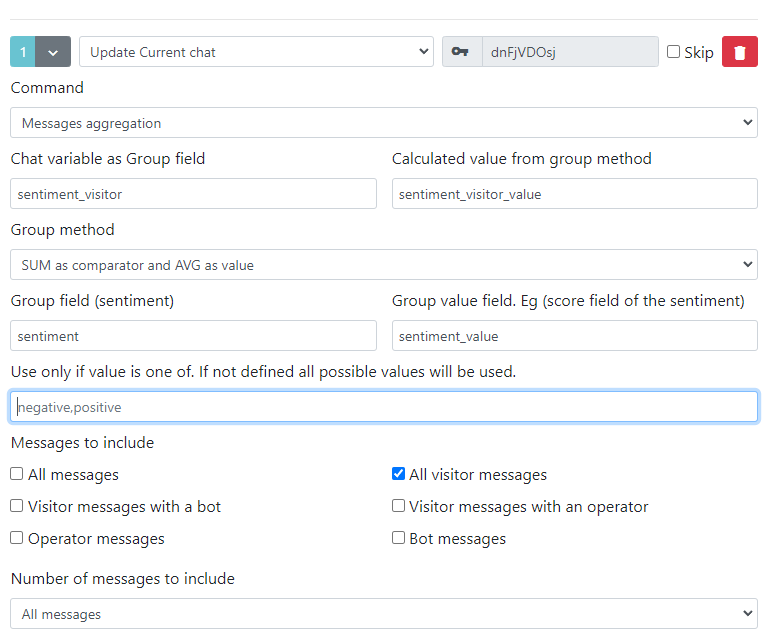
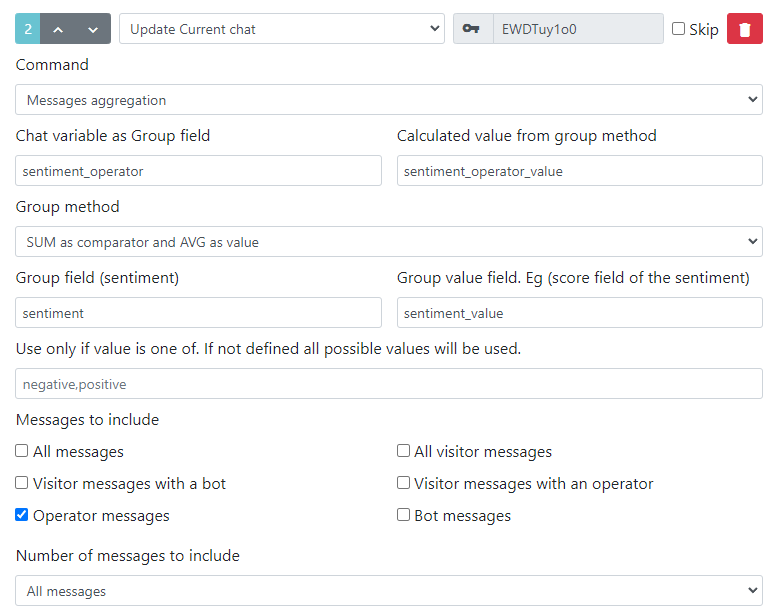
Sentiment Chat Trigger
Calculates the sentiment of visitor messages using SUM as comparator and AVG as value.
Calculates the sentiment of operator messages using SUM as comparator and AVG as value.
Calculates the ratio of positive messages compared to negative and positive messages.
Configuring the Webhook
In the webhook settings, define the events you want to listen for.
We are currently interested in the following events:
chat.web_add_msg_admin: Listens for operator messages and sets the sentiment.chat.chat_started: Listens for the first visitor message.chat.addmsguser: Listens for visitor messages (web widget).chat.close: Summarizes the sentiment based on chat messages.chat.addmsguser_webhook: Listens for visitor messages (incoming webhook).

Bonus
With this configuration, you can also display a custom icon based on the chat sentiment.
![]()