Install Guide
Alternative Installation Methods
- Use Docker
- Use Softaculous
Requirements
If you are running a WordPress site, Live Helper Chat is very likely to work seamlessly.
- Download the latest version as a zip or tgz archive.
- Alternatively, download a version with dependencies included from the releases page. Look for the newest file named
*.**v-with-dependencies.tgz. - PHP version 8.2 or higher is required. For older PHP versions, you will have to install composer dependencies manually.
- MySQL 5.7 or MariaDB 10.2.3 or higher with
json_functions support. - Apache or Nginx web server.
- For the Laravel version, see livehelperchat_laravel.
# Optional but Recommended
php-phpiredis
php-imap
php-pecl-redis4
php-pecl-igbinary
php-geos
php-fpm
php-opcache

# Required
php-json
php-cli
php-gd
php-xml
php-common
php-pdo
php-pecl-zip
php-mysqlnd
php-mbstring
php
php-bcmath
Composer Dependencies
These steps are not required if you downloaded a version with dependencies included.
If you are using a version with mail support (version 3.30v or newer), run the following command from the lhc_web folder:
composer.phar install
If you encounter an issue such as an incompatible PHP version, try removing the composer.lock file and running the installation again:
rm composer.lock
composer.phar install
You can download composer.phar from https://getcomposer.org/download/.
Folder Permissions
- After granting write permissions to the cache folder, you should see the installation page. If you encounter an error instead, ensure that:
- Your browser is pointing to the correct URL:
index.php/site_admin/install/install. - You have granted recursive write permissions to the cache folder.
- Your browser is pointing to the correct URL:
Try changing the owner to the Apache user or the user under which your HTTP server operates:
chown apache:apache -R cache/
chown apache:apache -R var/
chown apache:apache settings/
chmod -R 755 cache/
After these changes, you should see a screen similar to this:
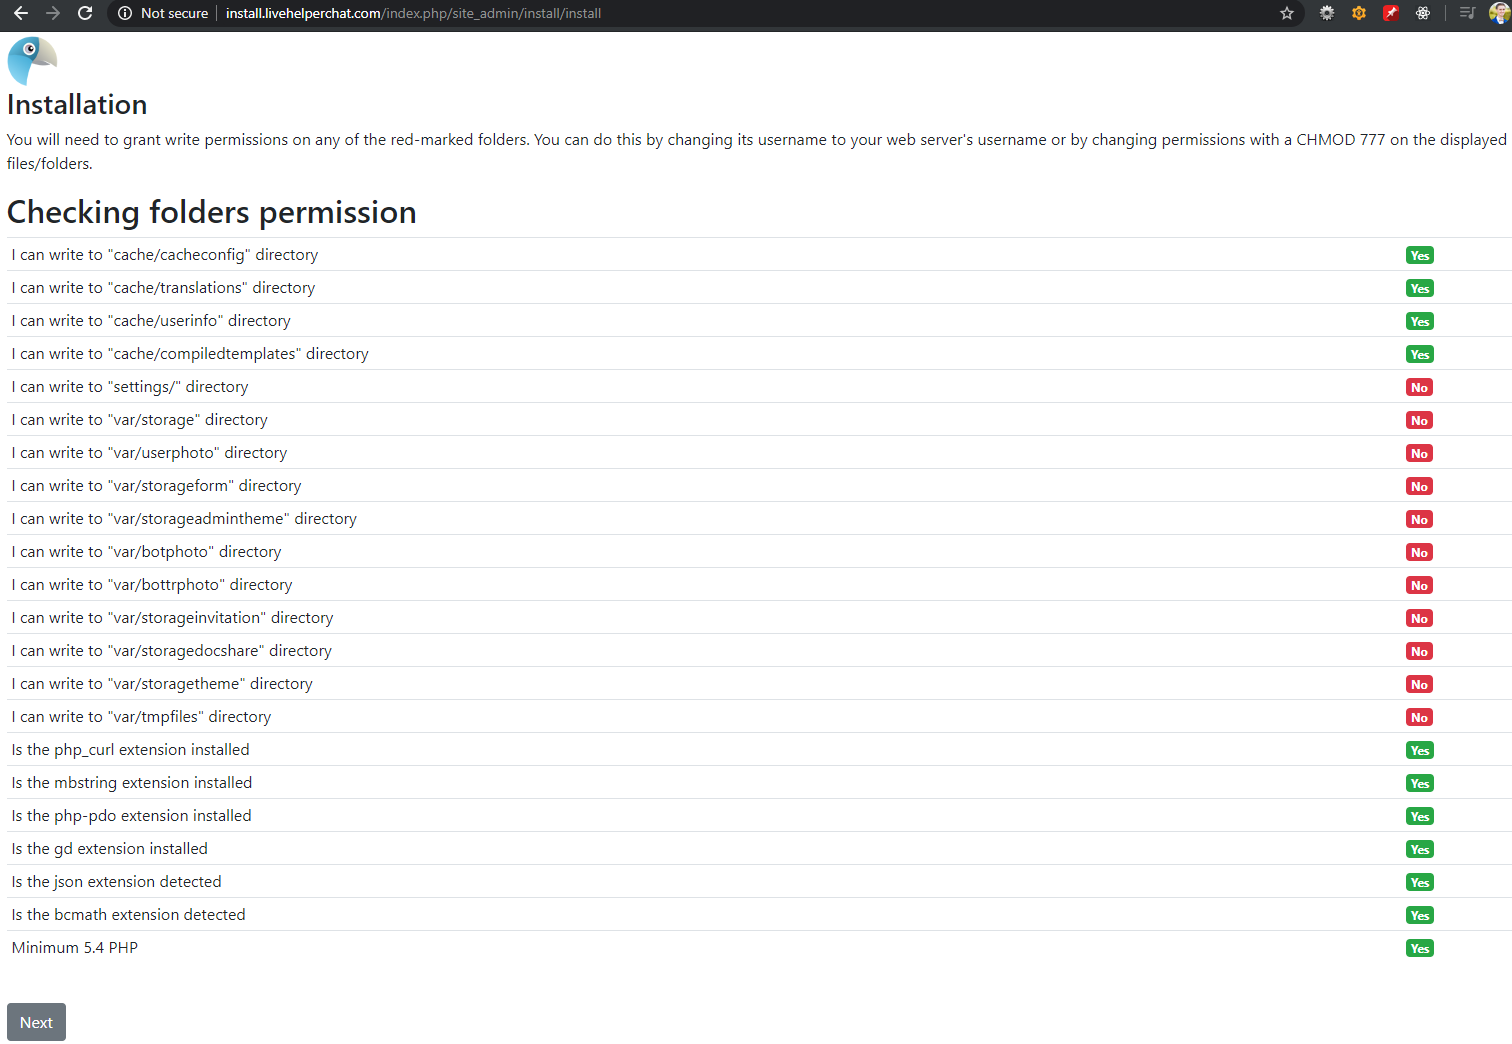
Next, grant write permissions to the required folders and files:
chmod 755 settings/
chmod -R 755 var/storage
chmod -R 755 var/userphoto
chmod -R 755 var/storageform
chmod -R 755 var/storageadmintheme
chmod -R 755 var/botphoto
chmod -R 755 var/bottrphoto
chmod -R 755 var/storageinvitation
chmod -R 755 var/storagedocshare
chmod -R 755 var/storagetheme
chmod -R 755 var/tmpfiles
After this step, all items should be marked in green.
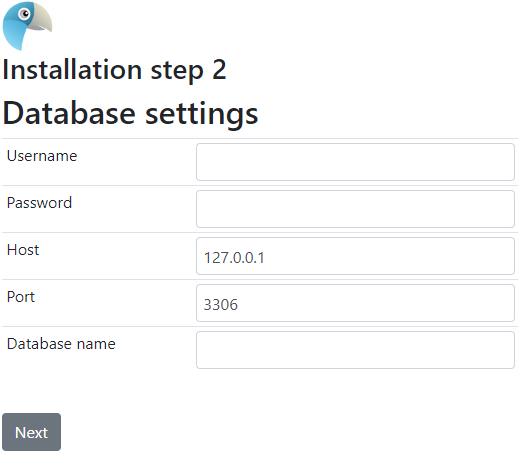
Database Settings
On the next screen, you will see a window where you need to enter your database settings. Ensure that the database has already been created.
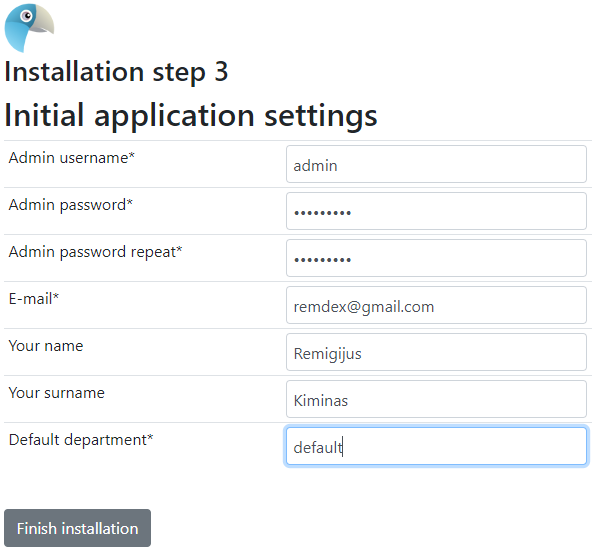
Application Initial Settings
Fill in these settings according to your requirements.
Installation Completed
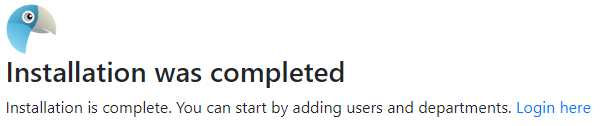
Logging into the Application
After clicking Login here, you will be redirected to the login window.
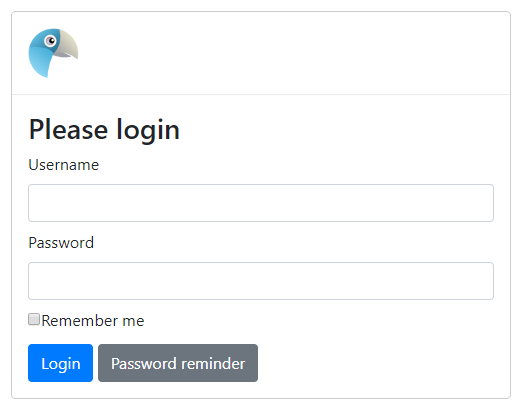
The installation URL is always index.php/site_admin/user/login.
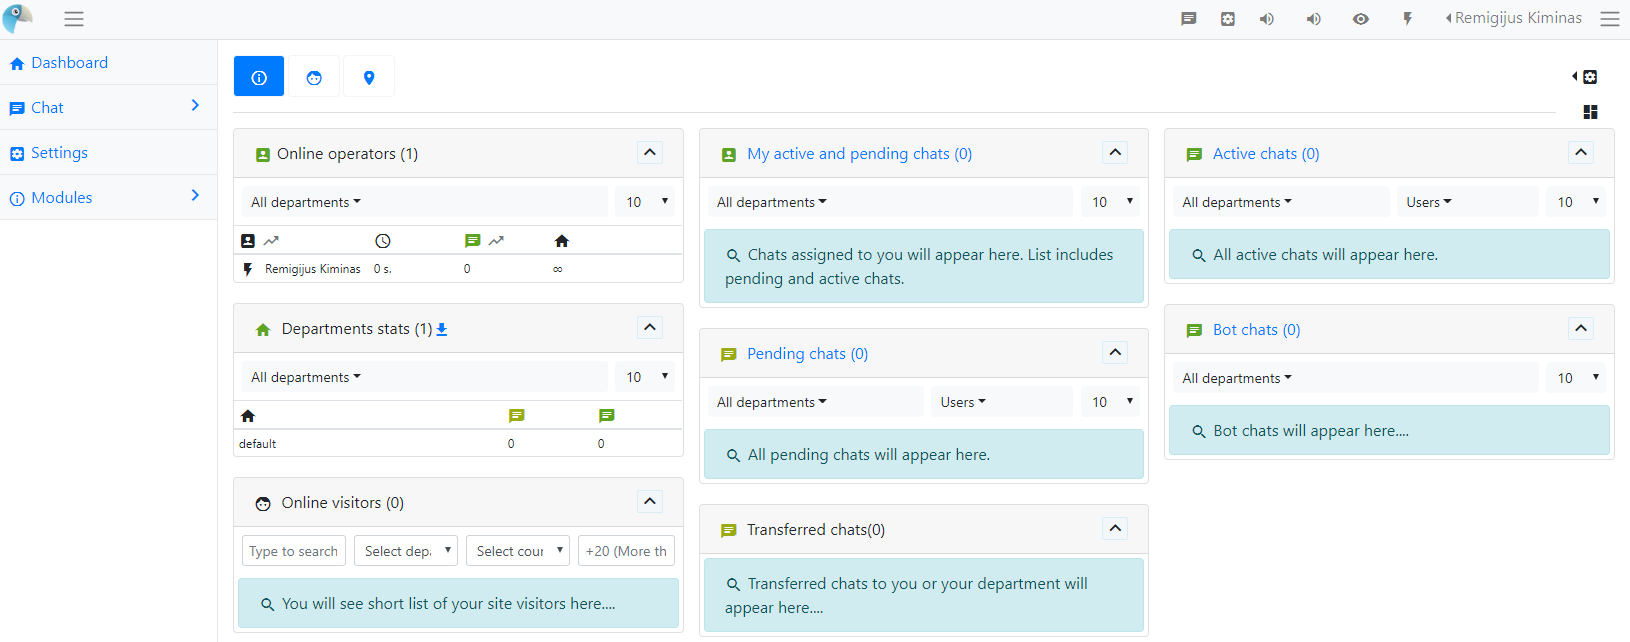
Dashboard Page
This is the main application window.
Generating Embed Code
Click the settings icon ![]() in the top menu. This will open the settings window.
in the top menu. This will open the settings window.
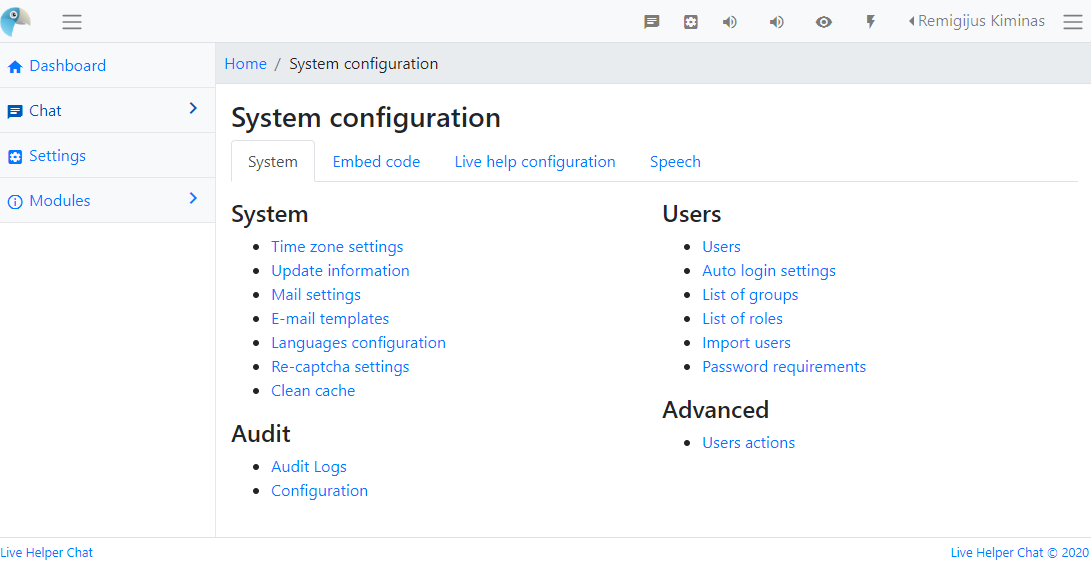
Navigate to:
Embed code -> Widget embed code (new)
You will then see a window like this:
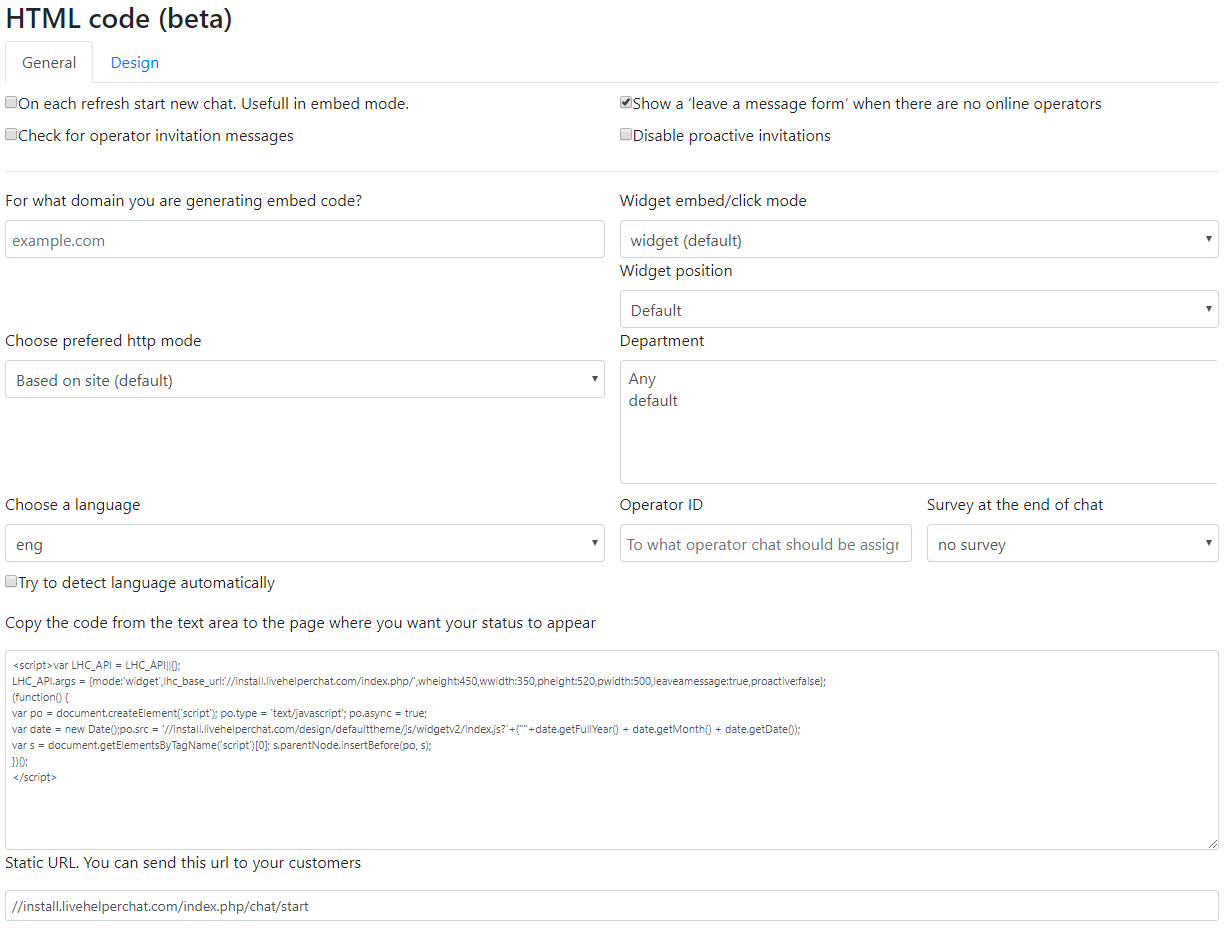
To enable proactive chat, check the option Check for operator invitation messages.
The embed code should look similar to this. If you copy this code, remember to change install.livehelperchat.com/index.php to your actual installation path:
<script>var LHC_API = LHC_API||{};
LHC_API.args = {mode:'widget',lhc_base_url:'//install.livehelperchat.com/index.php/',wheight:450,wwidth:350,pheight:520,pwidth:500,leaveamessage:true,proactive:true};
(function() {
var po = document.createElement('script'); po.type = 'text/javascript'; po.async = true;
var date = new Date();po.src = '//install.livehelperchat.com/design/defaulttheme/js/widgetv2/index.js?'+(""+date.getFullYear() + date.getMonth() + date.getDate());
var s = document.getElementsByTagName('script')[0]; s.parentNode.insertBefore(po, s);
})();
</script>
For more information and troubleshooting, refer to the integration article.
Proactive Invitation Setup
Navigate to:
System configuration -> Live help configuration -> Proactive chat invitations
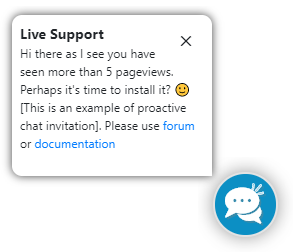
Here’s a demo configuration from demo.livehelperchat.com, which includes the following settings:
- A message is sent to the user after 20 seconds on the page or after viewing more than 2 pages.
- A random profile from online operators is shown.
- Delayed messages are available and can be configured in the autoresponder section.
- A long auto-delayed message is set for 40 seconds. If no operator accepts the chat within this time, a message indicates that all operators are busy.
You can view the proactive invitation setup on our demo installation:
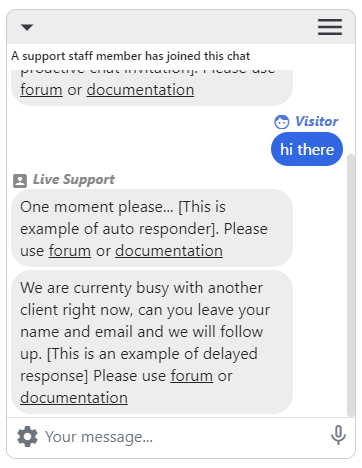
Here is the instant auto-response message:

Here is the automatic auto-response message:
Desktop Client
The desktop application is available at https://github.com/LiveHelperChat/electron. It is based on the Electron framework, functions as a standalone browser, and is significantly faster than Chrome.
Further Reading
- How to remove index.php from URL?
- How to set up automatic online/work hours?
- How to automatically change operator status to offline/online?
- How to rebrand it according to your site's style?
- How to use screen sharing?
- Try the Windows app or the Chrome extension
- Why do my users lose chat sessions when they navigate through the site, resulting in duplicate online user records?
On Windows IIS, I Get a 404 Error
Refer to this comment. This issue might occur due to too many URL segments.
Chat Does Not Start
If you are running behind CloudFlare or another proxy that affects the IP address seen by Live Helper Chat, enable it in the settings file:
Widget Content Looks Very Small on My Website
Ensure that your website includes a viewport tag:
<meta name="viewport" content="width=device-width, initial-scale=1">
My Widget Does Not Load
Try adding the following to your .htaccess file in the root folder lhc_web. If this folder does not exist, place the .htaccess file in the same folder as the index.php file. The .htaccess file must be placed in the Live Helper Chat folder, not the website folder.
AddType application/wasm .wasm

<Files ~ "\.(gif|jpe?g?|png|bmp|swf|css|js|svg|otf|eot|ttf|woff|woff2|swf|mp3|ogg|wasm|map|wav|pdf|ico|txt)$">
  Header always Set Access-Control-Allow-Origin "*"
  Header always Set Access-Control-Allow-Methods: "GET, POST, OPTIONS, PUT, DELETE"
  Header always Set Access-Control-Allow-Headers: "Origin, X-Requested-With, Content-Type, Accept, API-Key, Authorization"
</Files>
If the above solution does not work, try this configuration without the always keyword:
AddType application/wasm .wasm

<Files ~ "\.(gif|jpe?g?|png|bmp|swf|css|js|svg|otf|eot|ttf|woff|woff2|swf|mp3|ogg|wasm|map|wav|pdf|ico|txt)$">
  Header Set Access-Control-Allow-Origin "*"
  Header Set Access-Control-Allow-Methods: "GET, POST, OPTIONS, PUT, DELETE"
  Header Set Access-Control-Allow-Headers: "Origin, X-Requested-With, Content-Type, Accept, API-Key, Authorization"
</Files>
Other possible causes:
- You have modified
Chat configuration -> Misc -> Domains where script can be embedded. E.g example.com, google.com, but the embedded script's domain is not listed. - You have enabled
System configuration -> GEO Adjustmentwith invalid data. - You have blocked yourself via
System configuration -> Live help configuration -> Blocking -> Blocked users.
How Can I Limit the Widget to a Few Domains and Subdomains?
The widget can be embedded on multiple domains. More information.
Chat Was Closed, but When the Visitor Starts a New Chat, an Old Chat Opens
This is likely because you have enabled Chat configuration -> Misc -> Reopen chat functionality enabled.
Install from the Command Line
You can also install Live Helper Chat from the command line.
Copy the install-cli.php script to the root folder (lhc_web if you cloned from GitHub):
cp cli/install-cli.php install-cli.php
Copy the default example.settings.ini to settings.ini and modify it:
cp cli/example.settings.ini cli/settings.ini
Install Live Helper Chat:
php install-cli.php cli/settings.ini
Installation Under a Subfolder
If you are running a WordPress site with pretty permalinks, you might need to allow access to the Live Helper Chat subfolder. Your .htaccess file might look like this:
RewriteEngine On
# Previous rules
RewriteRule ^lhc_web/.*$ - [L]
# Afterward rules
If you experience logouts after a period of inactivity, it could be because your main website uses the same PHP session cookie name. Change php_session_cookie_name in the main settings file to something like lhc_session_id.
I don't get a sound/notification for new chats
Browser notifications and permission to play sound are shown at the top right in the back office. If you do not see any of those icons, it means the browser has permission to send notifications and play sound.
The Browser title also blinks if there is a new chat.

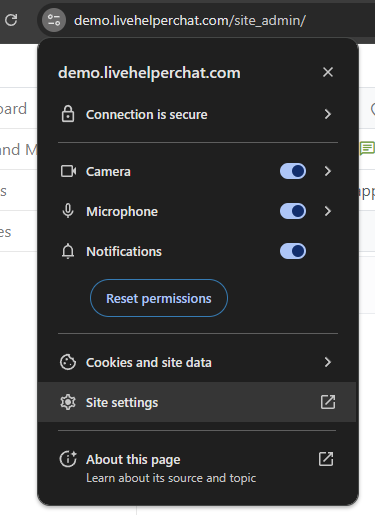
- To enable sound permissions at the browser level:
- Click anywhere on the page.
- Navigate to
Site settingsand chooseAllowforSound.
- Make sure also
Notificationsis set toAllow - As a precaution, you can in the same
Site settingschooseBackground syncand set it asAllowexplicitly

Browser notifications can be enabled by clicking the Ring icon and allowing the web page to send browser notifications.
Notifications/Sound requirements
- Make sure you see
PendingorMy active and pending chatswidgets in dashboard and your chats limit in them is bigger than the number of chats in the widgets, otherwise you won't get notification. - You have granted
Browser notificationsandSound notificationfor the agent. Those should NOT be visible for operator. - Make sure you are
OnlineOR in your account have checkedShow notifications if I am offline - Test notification in your account by clicking
Test notificationand entering chat ID - If you have checked in your account
Show notification only if I am an owner pending chatmake sure you are using an auto assignment process. - In
Synchronization and sound settingsyou can setHow many times play sound notificationhow many times play sound notification. - If you have limit of 5 chats set in
PendingorMy active and pending chatsand new chat comes you will not hear a sound because it would be six which is invisible. - If you still did not got a sound while opening a dashboard check connection status widget
- Using
System -> Online hoursyou can see were you online at that period or not. - If you have set
Change my online/offline status based on my activityin your account and you were offline at that moment, you won't receive notification. - In windows notifications settings
Soundcan be enabled for notification itself.Play a sound when a notification arrives. You should review a notification settings for Chrome browser.
Try using https://github.com/LiveHelperChat/electron/releases native desktop application.
How to Log In
To log in, navigate to the directory where the application is installed. The URL should look like: http://<your_domain>/index.php/site_admin/. site_admin is not a folder!!!
Few examples
https://example.com/lhc_web/login URL will behttps://example.com/lhc_web/index.php/site_adminhttps://example.com/chat/(you renamedlhc_webtochat) login URL will behttps://example.com/chat/index.php/site_adminhttps://chat.example.com/(you put content fromlhc_webdirectly as the root directory of the chat app) login URL will behttps://chat.example.com/index.php/site_admin
If you forget your password and the password reminder does not work, execute the following query to reset the password for the admin user (user_id 1) to demo:
UPDATE `lh_users` SET password = '$2y$10$IwnZfDcPm7nqvp/BLNmJietHT/TSHCRPXWHKFqheQfojwk4c4znVG' WHERE `id` = 1;
If you have modified roles, groups, or functions and cannot access the application, execute the following queries. They will grant all functions to the admin user (user_id 1).
The error you might encounter is:
You do not have permission to access the module "front" and use "use" function.
Execute these queries to restore the admin group, role, and permissions for the first user in the users list:
DELETE FROM `lh_group` WHERE `id` = 1;
DELETE FROM `lh_role` WHERE `id` = 1;
DELETE FROM `lh_grouprole` WHERE `id` = 1;
DELETE FROM `lh_groupuser` WHERE `id` = 1;

INSERT INTO `lh_group` (`id`, `name`, `disabled`, `required`) VALUES (1,'Admin',0,0);
INSERT INTO `lh_role` (`id`, `name`) VALUES (1,'Admin');
INSERT INTO `lh_grouprole` (`id`, `group_id`, `role_id`) VALUES (1,1,1);
INSERT INTO `lh_groupuser` (`id`, `group_id`, `user_id`) (SELECT 1,1,`lh_users`.`id` FROM `lh_users` ORDER BY `lh_users`.`id` ASC LIMIT 1);