Integrating live helper chat HTML into site
Integration
Integrating Live Helper Chat into your website is straightforward. Navigate to:
System configuration -> Embed code -> Live help embed code
You can test the widget on our demo page.
Choose Widget embed code.

Start a new chat on each page refresh (Useful in embed mode)
If you are automatically starting a new chat each time a visitor opens the widget and they see bot messages, the widget can act like a survey form. In this case, it makes sense to start a fresh chat each time.
Show a "leave a message" form when no operators are online
If you do not enable this option, the status widget will not be displayed when no operators are online. More information
Widget embed/click mode
There are three options:
widget- The widget will be shown when a visitor clicks the status icon.embed- The chat content will be rendered directly on the page.popup- A popup window will open when a visitor clicks the status icon.
Widget position
Default- The widget will be rendered in the bottom right corner.api- The status widget will not be rendered. You can activate the widget by calling JavaScript API functions.
Department
Select the department for which this code should be rendered. Choose "Any" for all departments, or select a specific department for this code.
You can choose more than one department. If you choose a department, Live Helper Chat will use that department's start chat form settings or fall back to the default settings if none are found.
Choose a language
Select a language. The JavaScript code below will be rendered in the selected language, depending on the combo box value. If you have multiple languages, choose a language to get the code for that language. Once this code is embedded into your website, the User/Visitor Widget interfaces will be in the chosen language.
You can enable Try to detect language automatically to attempt to detect the visitor's language. However, you must configure site access to match the content language. I suggest using themes and activating the Try to detect language from browser headers option in the Widget container section.
Operator ID
You can enter the ID of the operator to whom the started chat should be assigned. The chat will be visible as pending with the assigned operator.
Check for operator invitation messages
If this checkbox is selected, the User (Visitor) does not have to refresh the page to initiate the Invitation Logic (check for messages from the operator or check for the Proactive Chat Invitation message). Note that selecting this checkbox activates message checking for Users (Visitors) every 15 seconds, which increases server load.
- If you have the Proactive Invitation popup set to appear when Users (Visitors) spend 20 seconds on the site, you will not have to refresh the "Online Visitors" page to check this.
- If it is sufficient for the Invitation Logic to run whenever Users (Visitors) view a page, do not select this checkbox.
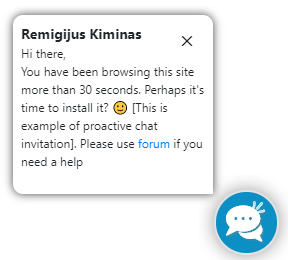
Disable proactive invitations
This disables proactive invitations. This is useful if you want to disable them on your site.
Static URL
A static URL can be used directly by pasting the address into a browser's URL bar. More information can be found in the JavaScript arguments article.
Static image
You can now generate static images as well. These static images can be used for emails, for example.
Code example 1:
<a href="//demo.livehelperchat.com/chat/start">
    <img src="https://demo.livehelperchat.com/site_admin/restapi/onlineimage?&online=I'm%20online&offline=I'm%20offline&w=200" alt="" />
</a>
Live example:
By default, the static image is not refreshed automatically. You can adapt the code to refresh the image every 60000 milliseconds (1 minute).
Example of the auto-refresh code for a static image:
Code example 2:
<a href="//demo.livehelperchat.com/chat/start">
    <img src="https://demo.livehelperchat.com/site_admin/restapi/onlineimage?&online=I'm%20online&offline=I'm%20offline&w=200" alt="" id="reloader" onload="setTimeout( () => { document.getElementById('reloader').src='https://demo.livehelperchat.com/site_admin/restapi/onlineimage?&online=I'm%20online&offline=I'm%20offline&w=200' + '?' + new Date().getMilliseconds() } ,60000)" />
</a>
Respecting the original example 1, we add the following code after alt="":
id="reloader" onload="setTimeout( () => { document.getElementById('reloader').src='test2.jpg' + '?' + new Date().getMilliseconds() } ,60000)"
Then, replace test2.jpg with the REST API Live Helper Chat URL.
FAQ
My widget does not work. I have Live Helper Chat installed on one domain, but the code is embedded on another domain.
This is most likely an issue with CORS rules. Here are some .htaccess samples you might need to apply.
.htaccess sample if you are embedding the code on only one domain. Remember to change it to your domain.
<Files ~ "\.(gif|jpe?g?|png|bmp|swf|css|js|svg|otf|eot|ttf|woff|woff2|swf|mp3|ogg|map|wasm|wav|pdf|ico|txt)$">
  Header always Set Access-Control-Allow-Origin "http://example.com"
  Header always Set Access-Control-Allow-Methods: "GET, POST, OPTIONS, PUT, DELETE"
  Header always Set Access-Control-Allow-Headers: "Origin, X-Requested-With, Content-Type, Accept, API-Key, Authorization"
</Files>
If the code will be embedded on multiple domains:
<Files ~ "\.(gif|jpe?g?|png|bmp|swf|css|js|svg|otf|eot|ttf|woff|woff2|swf|mp3|ogg|map|wasm|wav|pdf|ico|txt)$">
  Header always Set Access-Control-Allow-Origin "*"
  Header always Set Access-Control-Allow-Methods: "GET, POST, OPTIONS, PUT, DELETE"
  Header always Set Access-Control-Allow-Headers: "Origin, X-Requested-With, Content-Type, Accept, API-Key, Authorization"
</Files>
For Nginx, read this article.
What if you have to limit the widget to a few domains and subdomains?
Embedded on multiple domains:
<Files ~ "\.(gif|jpe?g?|png|bmp|swf|css|js|svg|otf|eot|ttf|woff|woff2|swf|mp3|ogg|wasm|wav|pdf|ico|txt)$">
  SetEnvIf Origin "(http(s)?://localhost:8080)|(http(s)?://www.domain1.ext)|(http(s)?://www.domain2.ext)|(http(s)?://subdomain1.domain.ext))$" AccessControlAllowOrigin=$0
  Header add Access-Control-Allow-Origin %{AccessControlAllowOrigin}e env=AccessControlAllowOrigin
  Header always Set Access-Control-Allow-Methods: "GET, POST, OPTIONS, PUT, DELETE"
  Header always Set Access-Control-Allow-Headers: "Origin, X-Requested-With, Content-Type, Accept, API-Key, Authorization"
</Files>

# DISABLE CACHING
<IfModule mod_headers.c>
    Header set Cache-Control "no-cache, no-store, must-revalidate"
    Header set Pragma "no-cache"
    Header set Expires 0
</IfModule>

<FilesMatch "\.(css|flv|gif|htm|html|ico|jpe|jpeg|jpg|js|mp3|mp4|png|pdf|swf|txt)$">
    <IfModule mod_expires.c>
        ExpiresActive Off
    </IfModule>
    <IfModule mod_headers.c>
        FileETag None
        Header unset ETag
        Header unset Pragma
        Header unset Cache-Control
        Header unset Last-Modified
        Header set Pragma "no-cache"
        Header set Cache-Control "max-age=0, no-cache, no-store, must-revalidate"
        Header set Expires "Thu, 1 Jan 1970 00:00:00 GMT"
    </IfModule>
</FilesMatch>
For Nginx on Plesk, you need this configuration added under domain > hosting & DNS (tab) > Apache & Nginx > Additional Nginx directives:
location ~* ^/internal-nginx-static-location/(.+\.(gif|jpe?g?|png|bmp|swf|css|js|svg|otf|eot|ttf|woff|woff2|swf|mp3|ogg|wasm|wav|pdf|ico|txt))$ {
    alias /var/www/vhosts/domain.ext/httpdocs/domainfolder/domainchat/livechat$1;
    internal;
    if ($http_origin ~* "^https?://(domain1.ext|www.domain1.ext|domin2.ext|www.domain2.ext)$") {
        add_header Access-Control-Allow-Origin "$http_origin";
    }
    add_header Access-Control-Allow-Methods 'GET, POST, OPTIONS, PUT, DELETE';
    add_header Access-Control-Allow-Headers 'Origin, X-Requested-With, Content-Type, Accept, API-Key, Authorization, X-Test';
}

proxy_connect_timeout 180s;
proxy_send_timeout 180s;
proxy_read_timeout 180s;
fastcgi_send_timeout 180s;
fastcgi_read_timeout 180s;
You also need to set the domain in the Live Helper Chat settings under Live Help configuration (tab), Chat configuration, Misc (tab), then compile the field: domains where script can be embedded. For example: example.com, google.com.
Additional block for "bad" live traffic unwanted that comes from a not authorized domain
Following the steps above will block an unauthorized domain from using your chat widget and generating traffic from a non-authorized domain. Sometimes, you may still see unwanted visits from unauthorized domains, which can originate from popup requests.
You can block the unauthorized domain by adding a rule to your .htaccess file. First, identify the unauthorized domain from which the visit originates in Live Helper Chat. In the example below, it will be badsite.domain.ext.
Code to add to the main .htaccess file in the root of Live Helper Chat:
For a domain:
RewriteEngine On
RewriteCond %{HTTP_HOST} baddomain\.ext [NC,OR]
RewriteCond %{QUERY_STRING} baddomain\.ext [NC]
RewriteRule .* - [F,L]
For a subdomain:
RewriteEngine On
RewriteCond %{HTTP_HOST} badsite\.domain\.ext [NC,OR]
RewriteCond %{QUERY_STRING} badsite\.domain\.ext [NC]
RewriteRule .* - [F,L]
With this code, you should stop visits from the unauthorized domains if they are still present after the previous steps.
How to make automatic status changes for frontend visitors?
Usually, when you go offline or online, visitors have to refresh the page to see the new widget status. It's possible to make status changes visible without requiring a page view.
You just have to go to:
Configuration -> Live Help configuration -> Chat configuration -> Visitor activity -> Interval between chat status checks in seconds, 0 disabled.
I suggest setting the value to 300, which will check the status every 5 minutes. Usually, if you have not changed the default configuration, the operator status changes if their last activity was 5 minutes ago.
In any case, if you want it to be more real-time, you can reduce this time. Keep in mind that every time a status check is performed, it involves a request to the server.
I'm offline/online, but my site shows that I'm online/offline?
Here are a few possible cases:
You are offline, but the page shows that you are online:
- You have set up department online hours, and the chat is showing the status based on that.
- There is a 5-minute timeout before the chat status changes to offline. This is the time since the operator was last seen. This can be changed in the chat configuration. I suggest not keeping it shorter than 30 seconds.
- By default, a page view is required to see the new operator status. If you do not want this, you can enable automatic status changes.
- You have assigned bot to department, but have not chosen
Bot follows online hours. Department will be offline if there is no online operators or it is outside work hours.. Assigned bot to department always make widget online mode.
You are online, but the webpage shows that you are offline:
- You have checked
Ignore users online statuses and use department online hoursin the chat configuration, but forgot to activate online hours in the department. - In department
Automate online hoursyou have chosenIgnore operators online statuses and use departments online hours. > Only for this department. - You have embed code without department, but all your departments are hidden. Hidden departments do not participate in global online status check.
How is it decided whether to show an online/offline user?
You should check these conditions if you are online, but the widget shows that no operators are connected.
- A visitor can be assigned to an Individual department, a Department, a Department Group, or all departments.
- When checking if someone is online, we first check whether a department was provided or not.
- Whether a department ID is or is not provided, we decide whether to show the widget based on this workflow:
- We check if someone is online from directly assigned operators or someone with all departments assigned.
- If we did not find anyone, we check if department online hours are provided.
- We also check if the department is overloaded or not. If the department is overloaded (the maximum pending chats limit has been reached), it will go to offline mode except if a bot is assigned.
- We check that the operator is online and has write access to the specific department or at least one department.
- If bot is assigned to department without choosing
Bot follows online hours. Department will be offline if there is no online operators or it is outside work hours.department will be always online. - Operators themselves can have two statuses:
- Online/Offline - Whether the operator is online or not.
- Visible/Invisible - If an operator opens a pending chat while in invisible mode, the chat is not assigned to them, and the chat status does not change.