
Slack Notifications

What does it do?

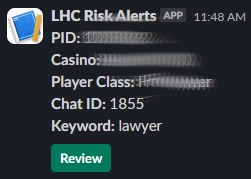
This guide explains how to send a Slack notification when a visitor sends a message containing a specific keyword. This method can also be adapted to send notifications for other events, such as new chats.

How does it work?

  • Set up a webhook in Home > System configuration > Webhooks for the chat.addmsguser event.
  • Create a bot and define the keyword to listen for.
  • Configure the bot to execute a REST API call to send the Slack notification.

REST API Setup

To use this feature, you need to create a Slack app and obtain a Webhook URL and a xoxb-xxx token. Save the JSON configuration below and import it into your Live Helper Chat instance.

{"name":"SlackNotification","description":"","configuration":"{\"host\":\"https:\/\/hooks.slack.com\",\"ecache\":false,\"parameters\":[{\"method\":\"POST\",\"authorization\":\"bearer\",\"api_key_location\":\"header\",\"query\":[],\"header\":[],\"conditions\":[],\"postparams\":[],\"userparams\":[],\"output\":[{\"key\":\"\",\"value\":\"\",\"id\":\"temp1705310616950\",\"success_name\":\"Failure\",\"success_header\":\"400\"}],\"id\":\"temp1705065304030\",\"suburl\":\"\/services\/XXXXX\/XXXXXXXXXX\/XXXXXXXXXXXXXXXX\",\"name\":\"NotifySlack\",\"auth_bearer\":\"xoxb-XXXXXXXXXXXX-XXXXXXXXXXXXXX-XXXXXXXXXXXXXXXXXXXXX\",\"body_request_type\":\"raw\",\"body_request_type_content\":\"json\",\"body_raw\":\"{\\n\\t\\\"blocks\\\": [{\\n\\t\\t\\\"type\\\": \\\"rich_text\\\",\\n\\t\\t\\\"elements\\\": [{\\n\\t\\t\\t\\\"type\\\": \\\"rich_text_section\\\",\\n\\t\\t\\t\\\"elements\\\": [{\\n\\t\\t\\t\\t\\\"type\\\": \\\"text\\\",\\n\\t\\t\\t\\t\\\"text\\\": \\\"PID: \\\",\\n\\t\\t\\t\\t\\\"style\\\": {\\n\\t\\t\\t\\t\\t\\\"bold\\\": true\\n\\t\\t\\t\\t}\\n\\t\\t\\t},{\\n\\t\\t\\t\\t\\\"type\\\": \\\"text\\\",\\n\\t\\t\\t\\t\\\"text\\\": \\\"raw_{{args.chat.chat_variables_array.pid}} \\\"\\n\\t\\t\\t}]}\n\\t\\t]},{ \\n\\t\\t\\\"type\\\": \\\"rich_text\\\",\\n\\t\\t\\\"elements\\\": [{\\n\\t\\t\\t\\\"type\\\": \\\"rich_text_section\\\",\\n\\t\\t\\t\\\"elements\\\": [{\\n\\t\\t\\t\\t\\\"type\\\": \\\"text\\\",\\n\\t\\t\\t\\t\\\"text\\\": \\\"Chat ID: \\\",\\n\\t\\t\\t\\t\\\"style\\\": {\\n\\t\\t\\t\\t\\t\\\"bold\\\": true\\n\\t\\t\\t\\t}\\n\\t\\t\\t},{\\n\\t\\t\\t\\t\\\"type\\\": \\\"text\\\",\\n\\t\\t\\t\\t\\\"text\\\": \\\"raw_{{args.chat.id}} \\\"\\n\\t\\t\\t}]}\n\\t\\t]},{ \\n\\t\\t\\\"type\\\": \\\"rich_text\\\",\\n\\t\\t\\\"elements\\\": [{\\n\\t\\t\\t\\\"type\\\": \\\"rich_text_section\\\",\\n\\t\\t\\t\\\"elements\\\": [{\\n\\t\\t\\t\\t\\\"type\\\": \\\"text\\\",\\n\\t\\t\\t\\t\\\"text\\\": \\\"Keyword: \\\",\\n\\t\\t\\t\\t\\\"style\\\": {\\n\\t\\t\\t\\t\\t\\\"bold\\\": true\\n\\t\\t\\t\\t}\\n\\t\\t\\t},{\\n\\t\\t\\t\\t\\\"type\\\": \\\"text\\\",\\n\\t\\t\\t\\t\\\"text\\\": \\\"raw_{{msg}} \\\"\\n\\t\\t\\t}]}\n\\t\\t]},{ \\n\\t\\t\\\"type\\\": \\\"actions\\\",\\n\\t\\t\\\"elements\\\": [{\\n\\t\\t\\t\\\"type\\\": \\\"button\\\",\\n\\t\\t\\t\\\"style\\\": \\\"primary\\\",\\n\\t\\t\\t\\\"text\\\": {\\n\\t\\t\\t\\t\\\"type\\\": \\\"plain_text\\\",\\n\\t\\t\\t\\t\\\"text\\\": \\\"Review\\\",\\n\\t\\t\\t\\t\\\"emoji\\\": true\\n\\t\\t\\t},\\n\\t\\t\\t\\\"url\\\": \\\"https:\/\/demo.livehelperchat.com\/site_admin\/front\/default\/(cid)\/{{args.chat.id}}\\\"\\n\\t\\t}]}\n\\t]}]}"}
  • After importing, you will need to adjust the Sub URL. The default value after import will be /services/XXXXX/XXXXXXXXXX/XXXXXXXXXXXXXXXX.
  • Set the correct value for the Bearer token in the Authorization field: xoxb-XXXXXXXXXXXX-XXXXXXXXXXXXXX-XXXXXXXXXXXXXXXXXXXXX.
  • Edit the Body section and set the correct URL for your Live Helper Chat installation.

Bot Setup

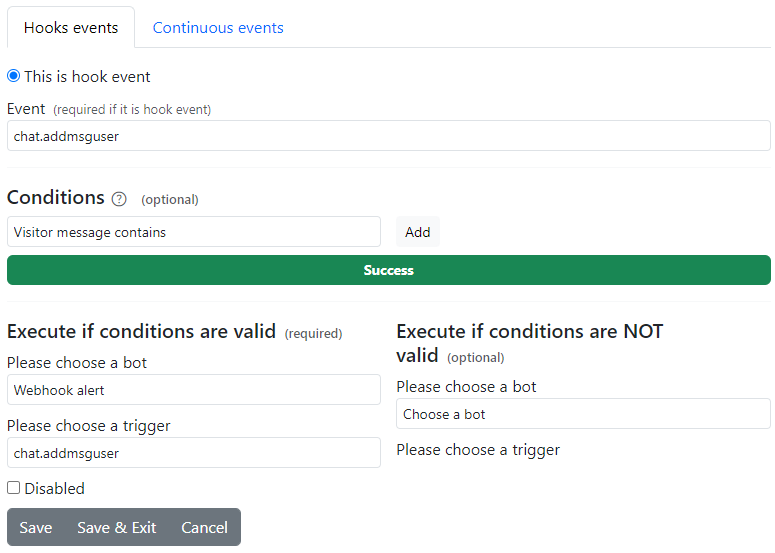
The following screenshots illustrate the trigger configuration for the webhook event (chat.addmsguser).

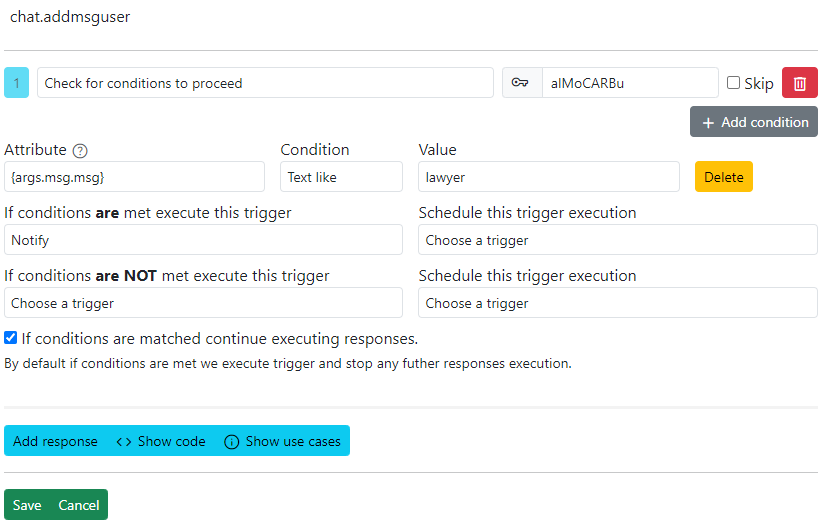
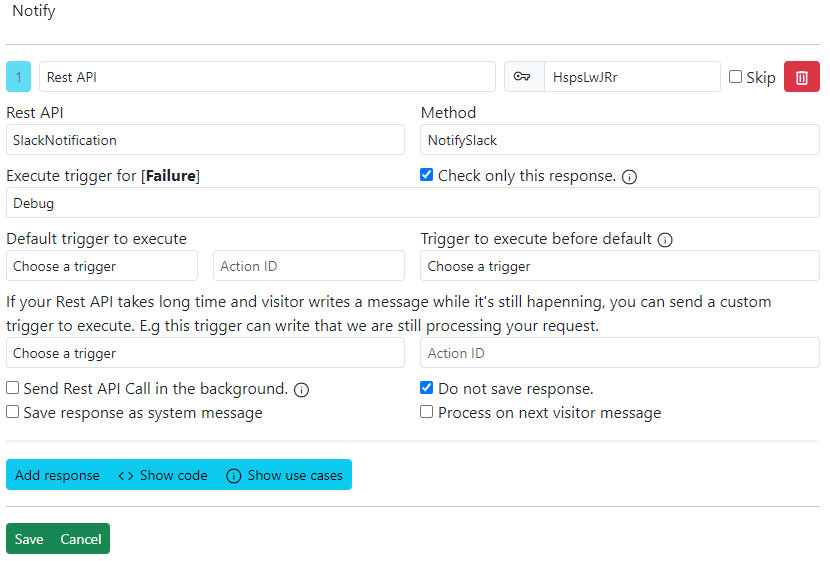
Notify trigger configuration:

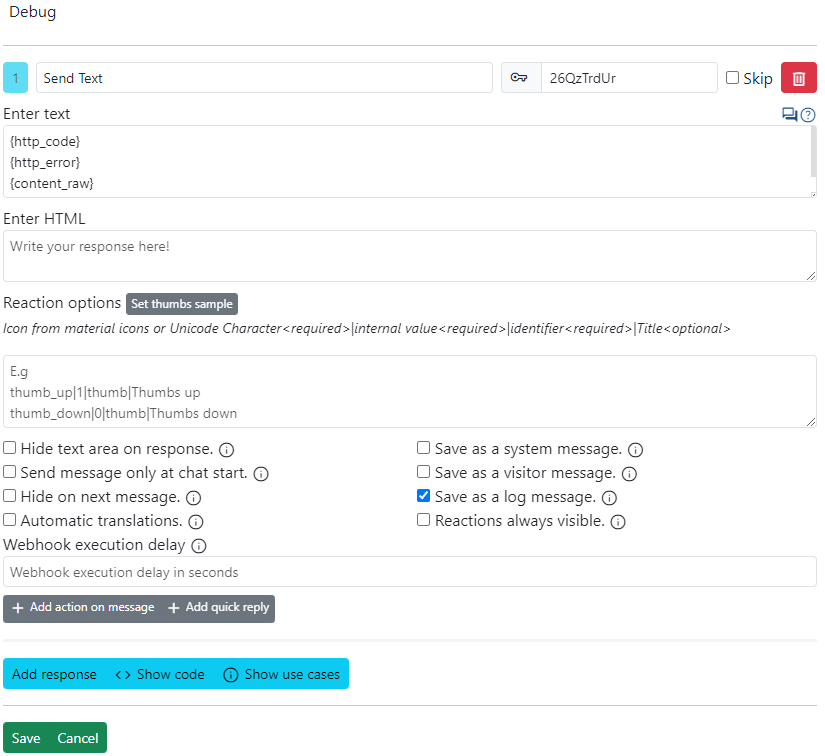
Debug trigger configuration:

{http_code}
{http_error}
{content_raw}
{http_data}

Webhook Configuration

Outcome