MessageBird WhatsApp/Facebook Messenger
This tutorial describes how to add WhatsApp support using the MessageBird product.
Useful information regarding integration:
- During integration, you will use the
https://whatsapp-sandbox.messagebird.com/v1/conversations/sandbox address. - After going live, switch to the production address:
https://conversations.messagebird.com/v1/conversations/
Setting the Webhook Address for Production
To set the webhook listener, execute the following curl command after replacing these variables:
<live access key>: Your live API/access key.<channel id from MessageBird back office>: The channel ID from the MessageBird back office.<identifier>: Your identifier.<lhc install path>: The installation path of Live Helper Chat.
curl -X POST "https://conversations.messagebird.com/v1/webhooks/" \
  -H "Authorization: AccessKey <live access key>" \
  -H "Content-Type: application/json" \
  -d '{
    "events": ["message.created","message.updated"],
    "channelId": "<channel id from MessageBird back office>",
    "url": "https://<lhc install path>/index.php/webhooks/incoming/<identifier> from lhc back office>",
    "settings": {
       "expected_http_code" : "2xx"
    }
  }'
Updating a Webhook
curl -X PATCH "https://conversations.messagebird.com/v1/webhooks/<webhook ID>" \
-H "Authorization: AccessKey <live access key>" \
-H "Content-Type: application/json" \
-d '{
"events": ["message.created","message.updated"]
}'
Listing Webhooks
curl -X GET "https://conversations.messagebird.com/v1/webhooks/" \
-H "Authorization: AccessKey <live access key>"
Deleting a Webhook
curl -X DELETE "https://conversations.messagebird.com/v1/webhooks/<webhook ID>" \
-H "Authorization: AccessKey <live access key>"
Incoming Webhook Definition
First, create an incoming webhook. You can import a configuration by downloading it here.
You will need to make the following adjustments:
- Change the
Identifierto a random string. - Choose a department.
- Click
Show integration information.- In
Attributes, set youraccess_key. - After going live, change
https://whatsapp-sandbox.messagebird.com/v1/conversations/tohttps://conversations.messagebird.com/v1/conversations/.
- In
- Set the scope to
messagebirdif it's missing.
Save the changes.
Sample Webhook Configuration
The following is a sample of the webhook configuration this supports:
{
    "contact": {
        "id": "3637e85836bd49a185c8cabd62a88f8c",
        "href": "",
        "msisdn": 37065272274,
        "displayName": "Remigijus Kiminas",
        "firstName": "",
        "lastName": "",
        "customDetails": [],
        "attributes": [],
        "createdDatetime": "2021-08-07T05:13:01Z",
        "updatedDatetime": "2021-08-07T05:13:01Z"
    },
    "conversation": {
        "id": "2386ce6e75af4286a5617f7900c498dd",
        "contactId": "3637e85836bd49a185c8cabd62a88f8c",
        "status": "active",
        "createdDatetime": "2021-08-07T05:13:01Z",
        "updatedDatetime": "2021-10-28T05:00:01.084071333Z",
        "lastReceivedDatetime": "2021-10-28T05:07:13.735316379Z",
        "lastUsedChannelId": "13e2cb41651e4af5a31bd379145433b5",
        "messages": {
            "totalCount": 0,
            "href": "https://whatsapp-sandbox.messagebird.com//v1/conversations/2386ce6e75af4286a5617f7900c498dd/messages"
        }
    },
    "message": {
        "id": "4587a9c901d7426ba66eb2ec153c68dd",
        "conversationId": "2386ce6e75af4286a5617f7900c498dd",
        "platform": "whatsapp",
        "to": "+447418310508",
        "from": "+37065272274",
        "channelId": "13e2cb41651e4af5a31bd379145433b5",
        "type": "text",
        "content": {
            "text": "Gggg"
        },
        "direction": "received",
        "status": "received",
        "createdDatetime": "2021-10-28T05:07:13Z",
        "updatedDatetime": "2021-10-28T05:07:13.735327939Z"
    },
    "type": "message.created"
}
Adding Another Phone Number
After completing all configurations:
- Export your working
Incoming webhook. - Re-import it and change the
Identifier. - Set the webhook for the new phone number.
Everything else should work out of the box.
REST API Call Setup
One-time configuration
This is required for sending admin messages back to the visitor (WhatsApp).
You can import the configuration by downloading it here.
Import the configuration. You do not need to change anything after importing.
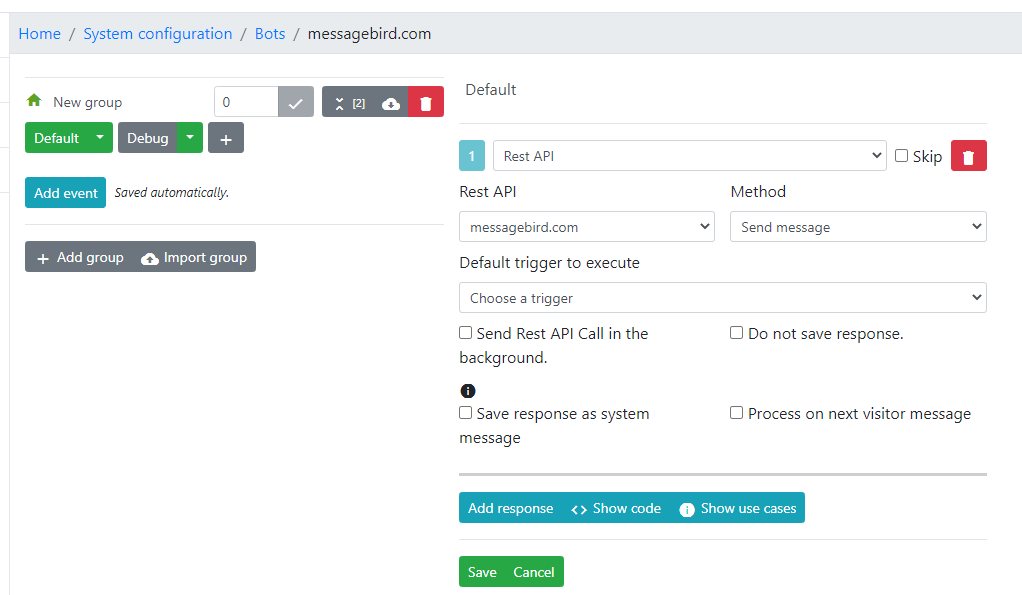
Bot Setup
One-time configuration
You need to set up a bot whose trigger will be executed upon a webhook event.
You can import the configuration by downloading it here.
- Set the correct REST API (which you imported previously) and the method to call.
The configuration should look like this:
Webhook Configuration
One-time configuration
Identical webhooks should be set up for these events:
chat.web_add_msg_adminchat.workflow.canned_message_before_save
Webhook configuration is needed for sending admin messages back to the visitor.
- Make sure you put the correct value for
whatsapp; it's the scope fromIncoming webhook- thescopeattribute.
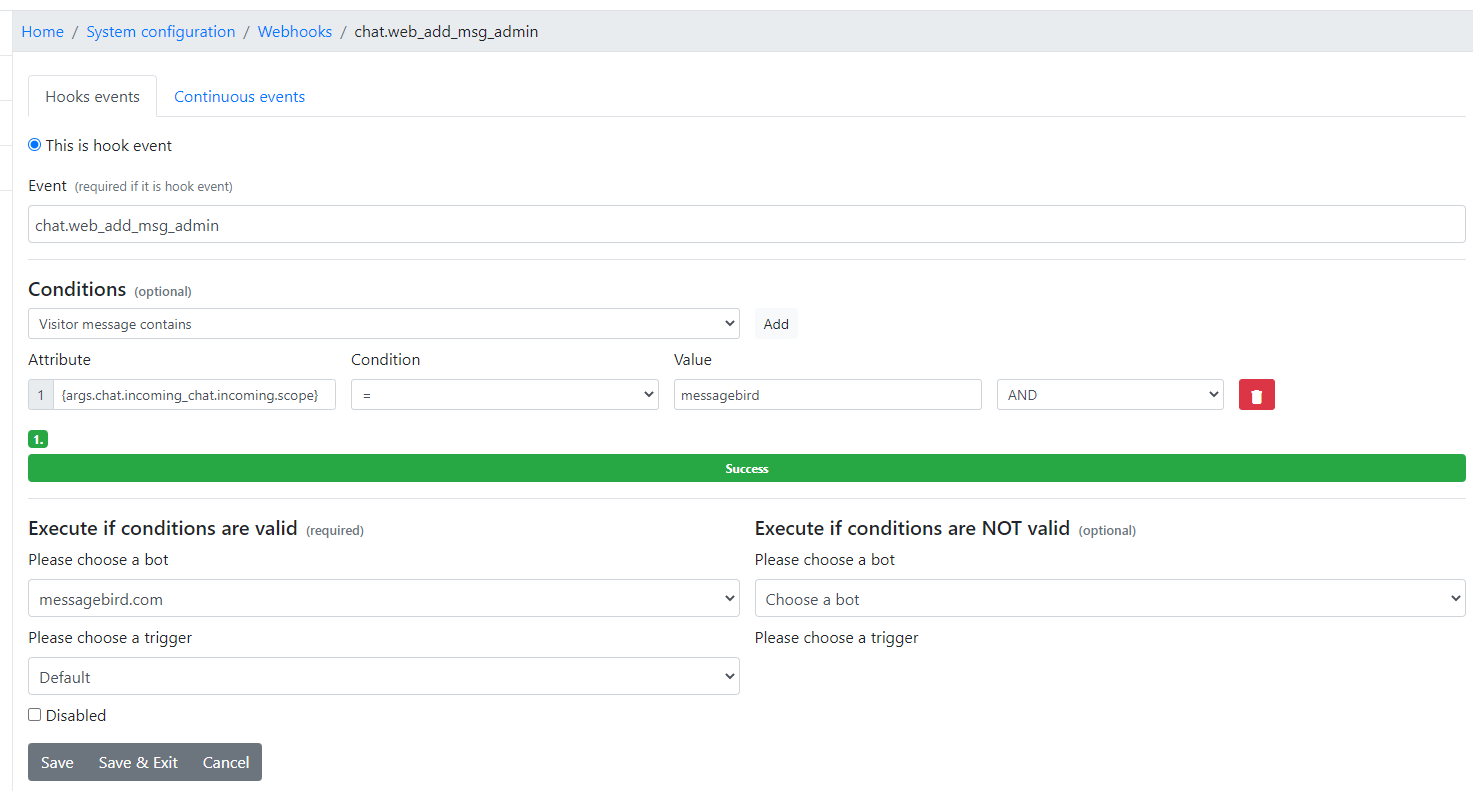
If you have done everything correctly, it should all be working without coding a single line.